14 Git
Git is a popular version control system that allows you to manage changes to your code over time. With Git, you can track changes to your R code, collaborate with other users, and easily revert to previous versions if something goes wrong. Silverman (2013)
In this section, we’ll cover a basic workflow for using Git with R, including setting up a Git repository, making changes to your code, and collaborating with others.
14.1 Getting started with GitHub
You will need to setup a GitHub account you can do so at https://github.com/. Find the Sign up or Create Account option and follow the prompts to setup an account.
Those who are new to GitHub might find the GitHub Desktop https://desktop.github.com/ software a nice interface to easily use Git features. When setting up GitHub Desktop you will need to use the same credentials you used when you created your account on GitHub.com.
Otherwise, you will need to also install Git, which you can do https://git-scm.com/.
14.2 Setting Up a Git Repository
There are a couple of methods for this, two which we will review are to use R and the second with GitHub Desktop.
14.2.1 With R
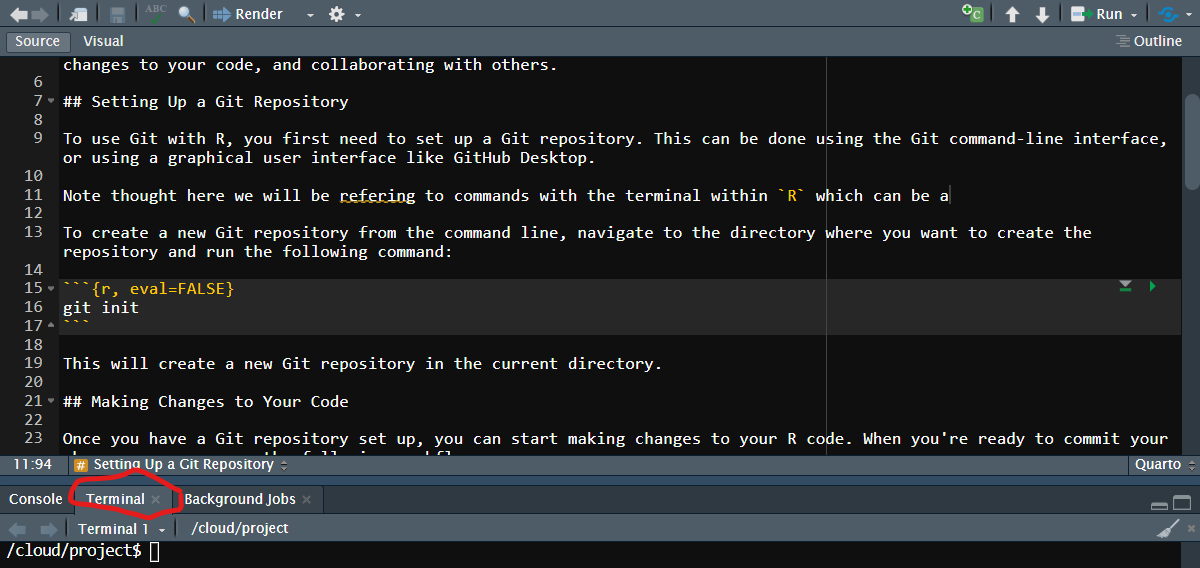
Note thought here we will be referring to commands with the terminal within R which can be accessed through here:
To create a new Git repository from the command line, navigate to the directory where you want to create the repository and run the following command:
Code
git initThis will create a new Git repository in the current directory.
14.2.2 with GitHub.com
You can also use https://github.com/ to create a repo for you.
- Click on the
+in the upper left hand corner - Select
New repository - By default you will be the owner of the Repository. If you have access to other accounts you can select which account should own the repository.
- Chose a name for the repository
- Chose if the repository will be Public (Anyone on the internet can see this repository. You choose who can make changes) or Private (You choose who can see and commit to this repository)
- Optionally, you can also:
- Add Description
- Add a README file
- Add
.gitignore-
.gitignorespecifies files that Git will ignore. This is useful to not track or upload files which you do not want to be backed up. This drop down menu provides a nice set of templates from which to choose from, and has an option for R.
-
- Choose a license
When you are satisfied with your setup, you can use Create repository button. Take notice of the repository URL.
14.2.3 Clone the repo with GitHub Desktop
If you are using GitHub Desktop you can now clone your repository 1. Go to File > Clone repository... 2. If you setup GitHub Desktop with the same account information, you can select the repository from the GitHub.com tab. Alternatively, you can clone the repository by pasting in the repository’s URL in the URL tab.
Once you have cloned the Git Repo you can setup an R Project by using the steps outlined in Section 1.1 with the knowledge that there is an existing directory already downloaded.
14.3 Making Changes to Your Code
Once you have a Git repository set up, you can start making changes to your R code. When you’re ready to commit your changes, you can use the following workflow:
14.3.1 Add the changes to the staging area:
Code
git add <file>14.3.2 Commit the changes:
Code
git commit -m "Commit message"This will create a new commit with your changes and a brief message explaining what you changed.
Code
git pushThis will send your changes to the remote repository so that others can see them.
14.4 Collaborating with Others
One of the major advantages of Git is that it makes it easy to collaborate with other users. To work with other users on a Git repository, you can use the following workflow:
Code
git clone <url>This will create a local copy of the repository on your computer.
14.5 Create a new branch:
Code
git checkout -b <branch_name>This will create a new branch where you can make your changes.
14.6 Make changes to your code:
Code
git add <file>
git commit -m "Commit message"
This will stage and commit your changes on your local branch.
14.7 Push the changes to the remote repository:
Code
git push origin <branch_name>This will send your changes to the remote repository on a new branch.
14.8 Create a pull request:
Once you’ve pushed your changes, you can create a pull request to merge your changes into the main branch. This will allow other users to review your changes and provide feedback before they are merged.
In summary, Git is a powerful tool for managing changes to your R code over time. With Git, you can easily track changes, collaborate with others, and revert to previous versions if something goes wrong. By following this basic workflow, you can use Git to manage your R code more effectively and collaborate with other users.